Installing operating systems on VirtualBox is addicting and can get you to try new OSes almost daily. But configuring a new virtual machine and going through the OS installation all over again becomes a chore after a few rounds.
A better way is to use Virtual Disk Images, which are hard disk images consisting of preinstalled operating systems that you can import into VirtualBox. Here’s everything you need to know about downloading and importing Virtual Disk Images into VirtualBox.

What Is a VirtualBox VDI File?
Virtual Disk Images, or VDIs for short, are associated with VirtualBox, a virtualization hypervisor used to create virtual machines (VMs). VDIs are virtual hard disk images you can import or add to your existing virtual machine.
During virtual machine configuration, remember the step where you have to create a hard disk image and allocate storage to the VM? A Virtual Disk Image is what you configure in that step.

VDIs are portable and you’re able to use them to run an operating system without going through the cumbersome installation process.
Severalsources to download VDI filesare available, but OSBoxes trumps the others with its huge catalog of pre-built VDIs.
To download a VDI file, head over toosboxes.com. From the top-right navigation menu, clickVM Images > VirtualBox Images.
Scroll down till you find a collection of VDIs ready to download and use. Expand any VDI entry from the list and clickVirtualBox (VDI) Image.

On the following page, from the list of available download options, click the one that fits your bill.
A 7z archive will start downloading. Once the download is complete, use 7-Zip orany other archive managerto extract the VDI file inside the archive.
Importing a VDI File Into VirtualBox
To begin, launch VirtualBox and clickNew. Specify a name for the virtual machine and select a folder where you want to store the VM files.
If you were installing an operating system using an ISO image, you’d select the image using theISO Imagedropdown. But in this case, you already have the operating system installed on a virtual hard disk, so to continue, expand theHard Disksection and check offUse an existing Virtual Hard Disk File.
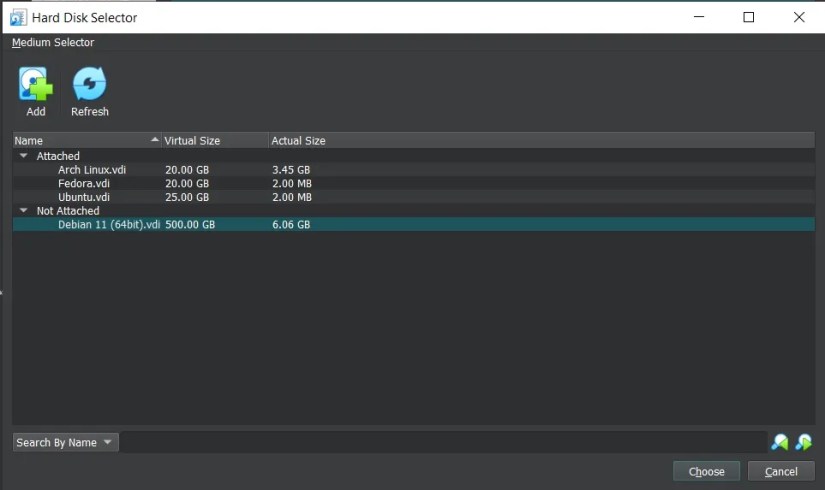
Click theFoldericon to open the Hard Disk Selector window and clickAddto browse the VDI file. Once selected, clickChooseto proceed.
you may also expand theHardwaresection if you want to modify the allocated memory or increase the number of cores allotted to the virtual machine. Once everything looks good, clickFinishto continue.
you’re able to also configure other aspects of the VM such as shared clipboard, display and audio settings, and USB devices by highlighting the virtual machine from the left pane and clickingSettings. Once you’re done, hitStartor double-click the virtual machine entry to boot the operating system.
When the machine has finished booting, you’ll be taken to the installed OS’s desktop. If prompted for the password, enter the displayed username, usually “osboxes.org” for VDIs downloaded from OSBoxes.
The password and username will be the same for most VDIs. If not, it will be mentioned on the website from where you downloaded the VDI.
You might have to select the OS from the bootloader menu if you’re setting up a Linux-based virtual machine.
Try New OSes Without Installing With VirtualBox
Virtual Disk Images save the time and effort that you would otherwise put into installing and configuring a new virtual machine.
If you’re a developer, virtual machines are a godsend as they allow you to test your code on different operating systems while using your host OS. Even those who don’t code can benefit from virtualization as its applications are endless.
